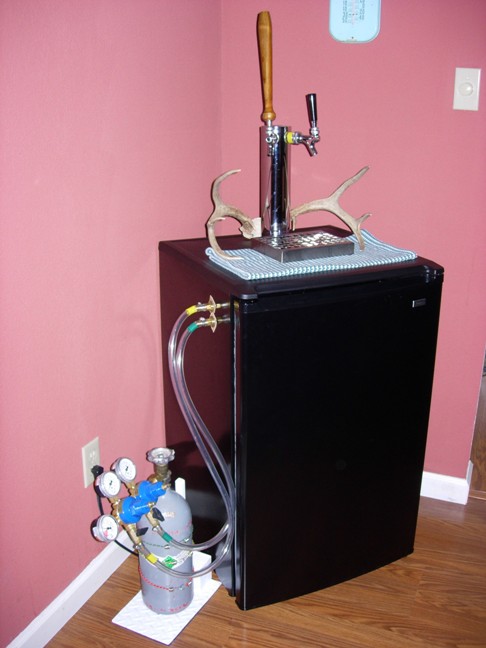
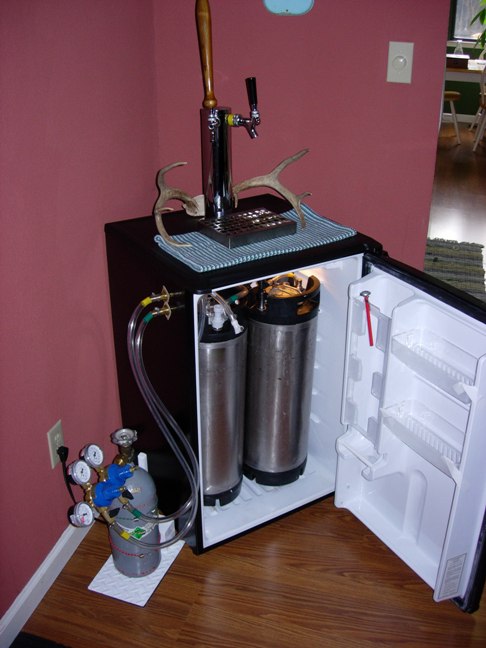
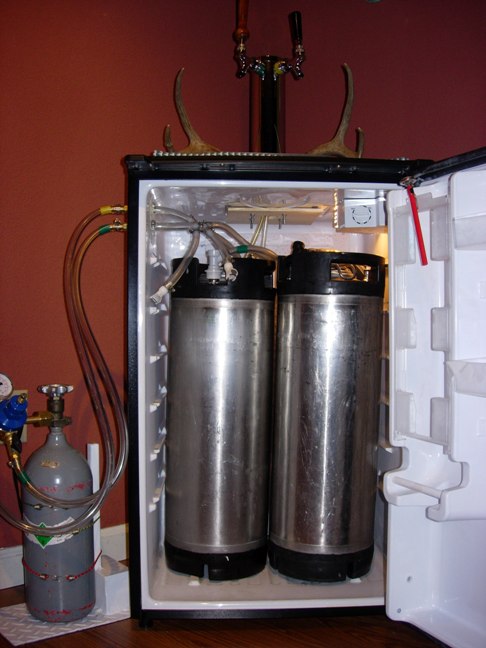
The Kegerator
I wanted a kegerator I could keep in the living room, without looking like a monstrosity. Sears has a mini fridge without a freezer section that is tall enough to hold corny kegs without alteration. I used a 2" hole cutting bit to drill through the top, then attached a two tap tower. While there is just barely enough room for two cornies and a 5lb CO2 tank in this unit, I chose to keep the tank on the outside which makes it easier to adjust pressure without fidgeting on the inside of fridge. I use a dual body regulator which allows me to serve two beers at different pressures, or to serve a beer at one pressure while simultaneously force carbonating another beer at a higher pressure. The Sears mini fridge is small, quiet, Energy Star rated, and isn't an eyesore in the game room. Click here for more detailed instructions on making this kegerator.
 |
 |
 |
The Stirplate
After listening to a podcast from The Brewing Network by Jamil Z., I got excited about making yeast starters. Stirplates are one way of increasing your pitchable yeast cell count. By combining a yeast starter and stirplate you can maximize the potential for yeast cell reproduction. One yeast study has shown more than a 2 to 1 cell count increase when an aerated starter is used in conjunction with a stirplate, versus an aerated but unstirred starter. Stirplates foster yeast cell reproduction by allowing a gaseous exchange in the form of carbon dioxide release and oxygen intake. Additionally, keeping yeast cells in constant suspension provides continuous access to the starches serving as their food source. The bottom line is stirplates greatly increase the potential for yeast cell reproduction in starters. Pretty slick, and pretty cheap (maybe $20, which beats the $125 price tag at most LHBS's). Detailed instructions for building a stirplate can be found here.
 |
 |
 |
 |
The CO2 Tank Stand
If you have a CO2 tank, you've probably had it tumble over. If you're like me, you've had it tumble over endlessly. Making things worse I have a dual regulator on my tank making it even more top heavy. In a fit of desperation I took my tank to friend's house and took over his welder (thanks Aaron). I took some spare stock and welded two very heavy pieces to a scrap section of diamond plate. Next to that I welded a length of tube for vertical support. A little grinding, some primer and a coat of white appliance paint got me bomb proof (and very heavy) untippable base for my CO2 tank. I use three cheap bungees to attach the tank to the stand, and I haven't had a tumble since.
 |
 |
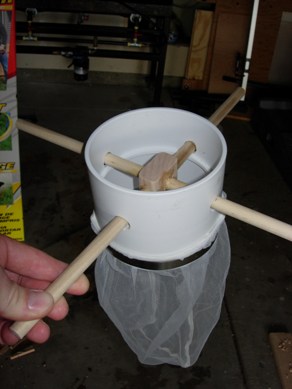
The Hop Hanger
I really wish I could take credit for this one, but I saw a similar gadget posted on the green board. It's a 4in PVC pipe coupler. I drilled four holes and fixed wood dowels through the center. A one gallon hop bag is connected to the coupler which rests on top of the boil kettle. No more individual hop bags, tying knots, and fishing out before the wort chill - just weigh your hop addition and chuck 'em in. An added bonus is increased hop utilization from the increased flow. Five gallon hop bags are available for those that use fresh hops.
 |
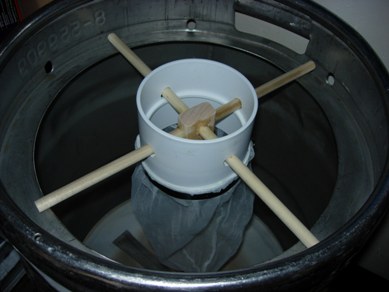 |
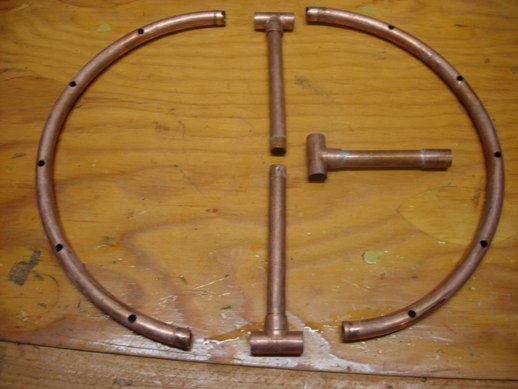
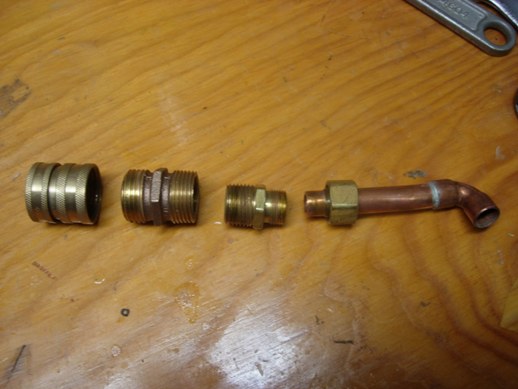
Mash Recirculation Arm
Originally my mash tun had a custom sparge ring welded in by the nice guys in B3's metal shop, but I never really liked the design. It had an anchor point below the mash, it was fiddly, and mid-brew adjustments were impossible. After a few design attempts I've settled on an ajustable hanging ring, which I use to recirculate the wort while I'm step mashing. I use a direct heated mash tun and raise the grain bed temperature by putting the mash tun on VERY low flame. Wort is pumped out through the pick-up tube below my false bottom and recirulated back into the mash through the haning recirculation arm and ring. Not a bit of scorching and the wort runs exceptionally clean when transfer to the boil kettle. The arm is height adjustable and attaches easily with a quick disconnect. Detailed instructions for building a recirculation arm can be found here.
 |
 |
 |
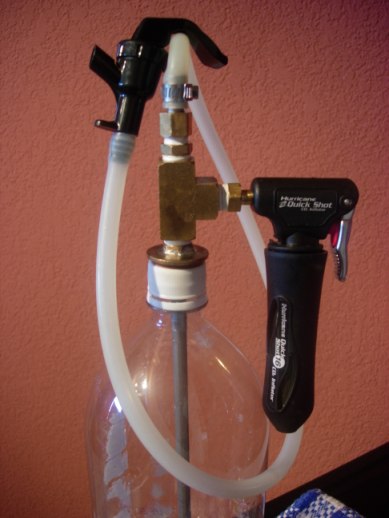
Minitap
Once again I find myself really wishing I had invented this one. Thanks again to the wealth of knowledge available on The Brewboard forum I found this very cheap, portable 2 liter minitap system. Yeah it's not gonna cut it for those big bbq's or tailgate parties, but when you want to take a six pack somewhere and don't feel like bottling this sytem will come in handy. You only have to wash and santize one bottle, filling is easy, dispensing is just like a keg, and hey...it looks pretty damn cool. I've created detailed instructions for building one here.